How to 3D Print Clear Filament: The Realistic Guide to Transparency
Loading a brand-new spool of "clear" filament into your 3D printer is exciting. You picture creating custom, glass-like lampshades, invisible electronics enclosures, or crystal-clear tabletop miniatures.
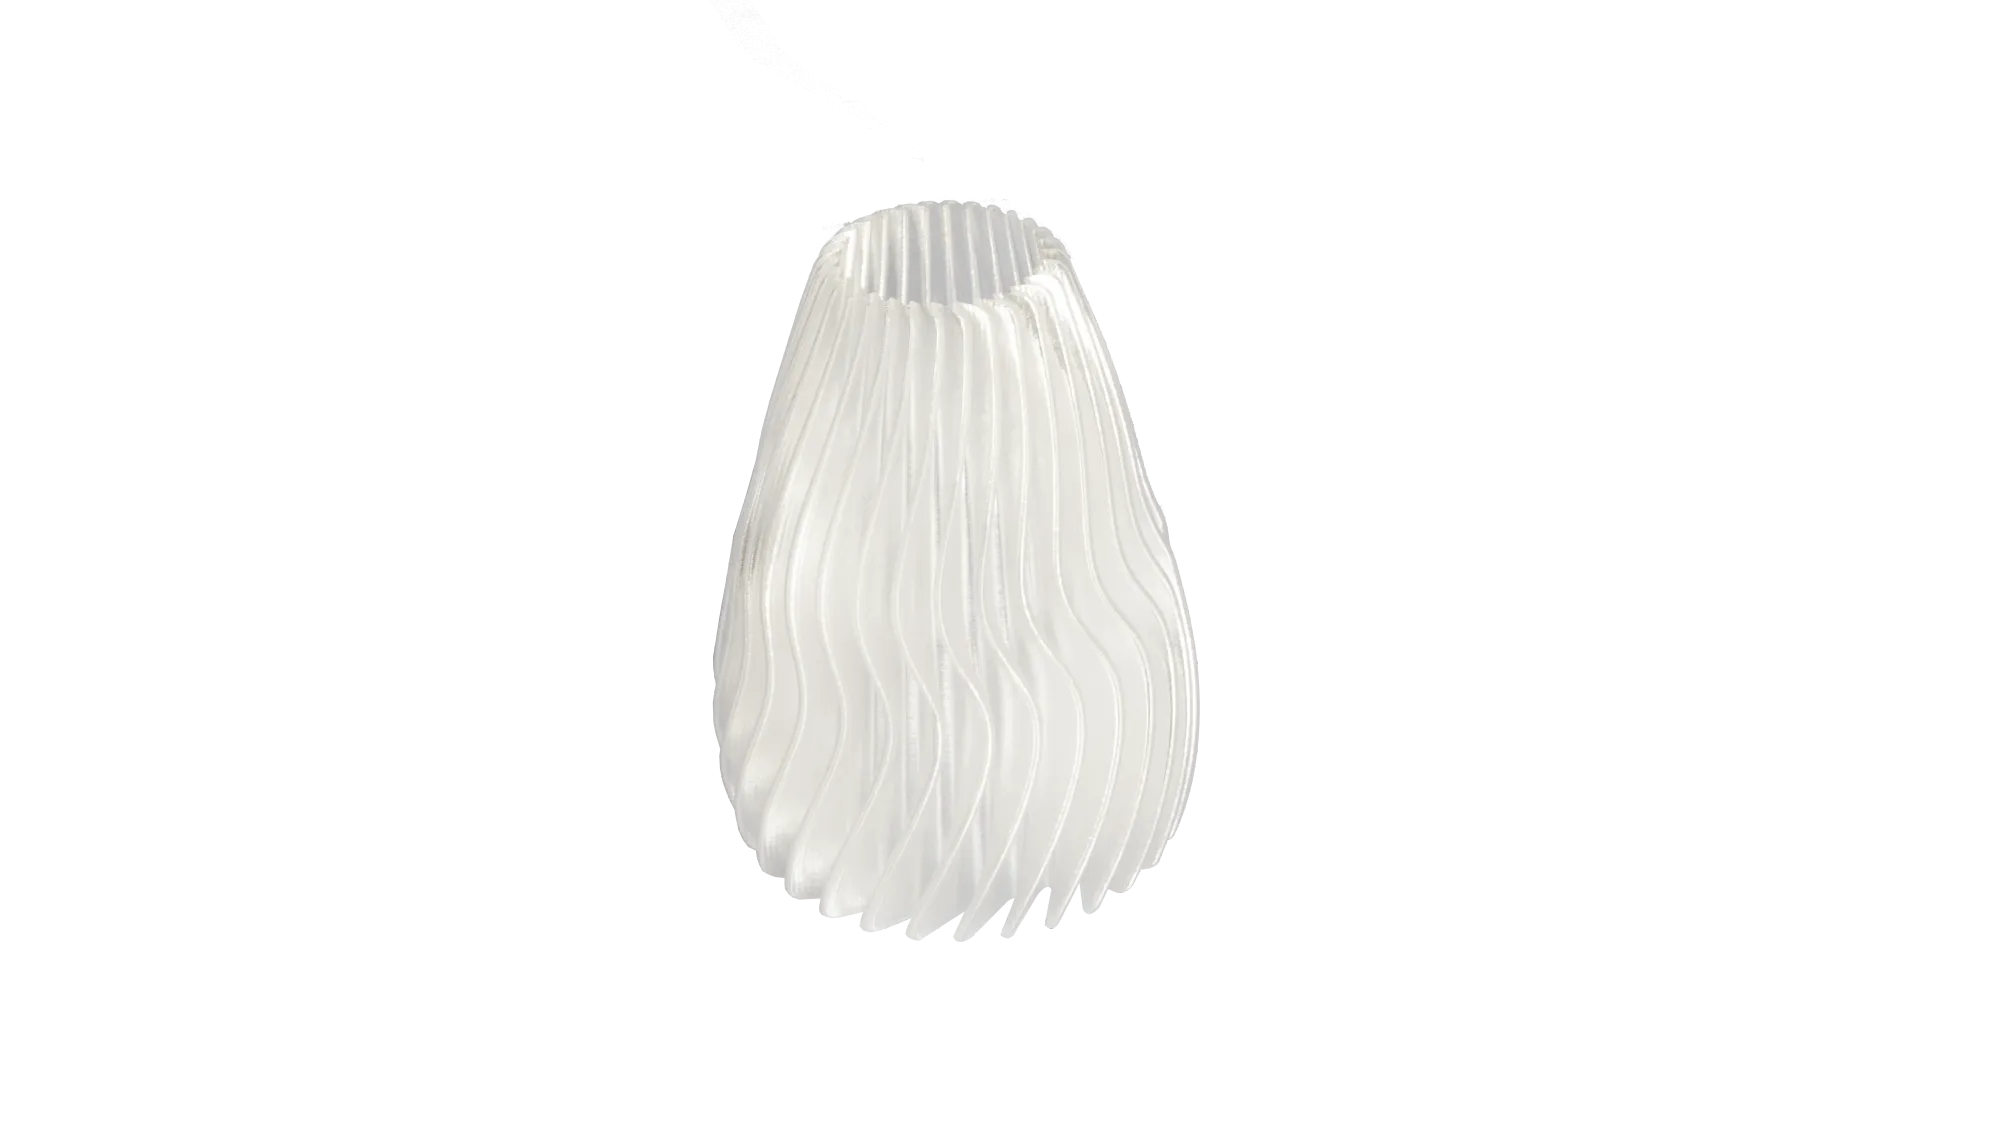
Then, the print finishes, and the reality of FDM (Fused Deposition Modeling) 3D printing sets in. Instead of a pristine, see-through object, you are holding something that looks like frosted glass, cloudy ice, or a milky white plastic block.
If this has happened to you, you are not alone. It is one of the most common frustrations in the maker community. The hard truth is that "clear" filament straight off the spool will almost always yield a frosted or highly translucent result, not true glass-like transparency.
However, by understanding the physics of why your prints are cloudy, mastering a few counter-intuitive slicer settings, and applying the right post-processing techniques, you can drastically improve optical clarity and push your clear filament to its absolute limits.
Key Takeaways
- Set Realistic Expectations: Standard FDM printing naturally creates frosted or translucent prints due to light refracting off layer lines. Perfect "glass" right off the print bed is virtually impossible without post-processing.
- Material Matters: Clear PETG provides superior optical clarity compared to Clear PLA, though PLA is easier to print for simple translucent projects.
- Settings Are Everything: Achieving maximum clarity requires printing hotter, significantly slower, and using 100% aligned rectilinear infill to fuse layers and remove air gaps.
- Post-Processing is Mandatory for Glass-Like Finishes: To achieve true transparency, you must eliminate the exterior ridges through wet sanding, polishing, or applying a smooth clear coat.
Does Clear 3D Printer Filament Actually Work?
Before you start tweaking settings or buying expensive spools, you need to understand the fundamental mechanics of your printer.
FDM 3D printers work by melting a strand of plastic and squeezing it through a nozzle, building an object layer by layer. This process creates two major obstacles to transparency:
- Layer Lines (Refraction): Think of a clear, smooth pane of glass. Light passes right through it. Now imagine taking hundreds of tiny, clear glass tubes and stacking them together. When light hits those curved surfaces, it bounces, bends, and scatters in a million directions. This is called refraction. The curved exterior of your 3D printed layer lines acts exactly like those stacked tubes.
- Micro-Gaps (Internal Reflection): When your printer lays down adjacent lines of filament, tiny, microscopic pockets of air are inevitably trapped between them. Every time light travels through the plastic and hits one of these tiny air bubbles, it scatters again.
This combination of exterior layer curves and internal air pockets is what turns a strand of perfectly clear plastic into a frosted, cloudy print. The secret to transparent 3D printing is simple in theory, but tricky in practice: you must minimize the gaps and smooth the curves.
Choosing Your Material: Clear PLA vs. Clear PETG

Not all clear filaments are created equal. When deciding what to load into your extruder, you have two primary options for standard desktop printing.
Clear PLA (Polylactic Acid)
PLA is the most popular 3D printer filament type because it is incredibly easy to print, rarely warps, and doesn't require an enclosure.
However, standard Clear PLA is better described as "translucent." It is excellent for printing objects where you want light to shine through—like an LED diffuser or a glowing vase—but achieving actual, optical transparency (where you can clearly see an object on the other side) is incredibly difficult. If you are printing something decorative that requires easy bed adhesion, PLA is the way to go.
Clear PETG (Polyethylene Terephthalate Glycol)
If you are serious about achieving the highest level of optical clarity possible with FDM, PETG is the superior choice.
PETG is naturally more transparent than PLA and features excellent layer adhesion. Because the layers bond together so well, it creates fewer internal micro-gaps for light to scatter against. While it is more prone to stringing and requires slightly higher temperatures than PLA, the results are worth the effort. Comparing PETG vs. PLA will help you decide if you are ready to tackle the slight learning curve of PETG for better clarity.
(Note: Advanced users often look toward Polycarbonate (PC) for extreme transparency, but it requires a high-temperature hot end and a fully enclosed printer, making it less accessible for beginners.)
How to Adjust Slicer Settings for Maximum Clarity
If you want to move from "milky" to "highly translucent," you need to abandon your default slicer profiles. Standard profiles prioritize speed and visual detail, both of which are the enemy of transparency.
You need to tell your slicer to melt the plastic hotter, push it out thicker, and lay it down slower to eliminate those light-scattering air gaps.
1. Print Hot (Increase Nozzle Temperature)
To fuse the layers together perfectly and eliminate internal voids, you need the filament to be as fluid as possible when it exits the nozzle. Increase your hot end temperature to the absolute upper limit recommended by the filament manufacturer. For example, if your Clear PETG spool recommends 230°C - 250°C, print at 250°C.
Warning: Printing too hot can cause the plastic to boil or yellow, so watch your first few layers carefully.
2. Print Extremely Slow
Speed creates microscopic imperfections. If you want clear prints, you must exercise patience. Drop your print speeds down significantly—often as low as 15mm/s to 20mm/s. This gives the hot plastic time to settle and merge with the previous layer before cooling, creating a denser, more uniform structure.
3. Use 100% Aligned Rectilinear Infill
This is the most crucial slicer setting. Standard infill patterns (like grid or gyroid) create massive internal air pockets, instantly ruining any chance of transparency. You must set your infill to 100%. Furthermore, ensure the pattern is set to "Aligned Rectilinear" (sometimes just called "Lines"). This ensures that every layer of infill is laid down in the exact same direction, rather than crisscrossing. Crisscrossing lines create tiny gaps where they overlap; aligned lines fuse into a solid block.
4. Over-Extrude Slightly (Flow Rate)
If you are still seeing tiny gaps between your infill lines, you may need to increase your flow rate (also known as the extrusion multiplier) by 1% to 5%. This forces the printer to push out slightly more plastic than it mathematically needs, intentionally "squishing" the lines together to fill any remaining microscopic air pockets.
5. Thicker Layer Heights
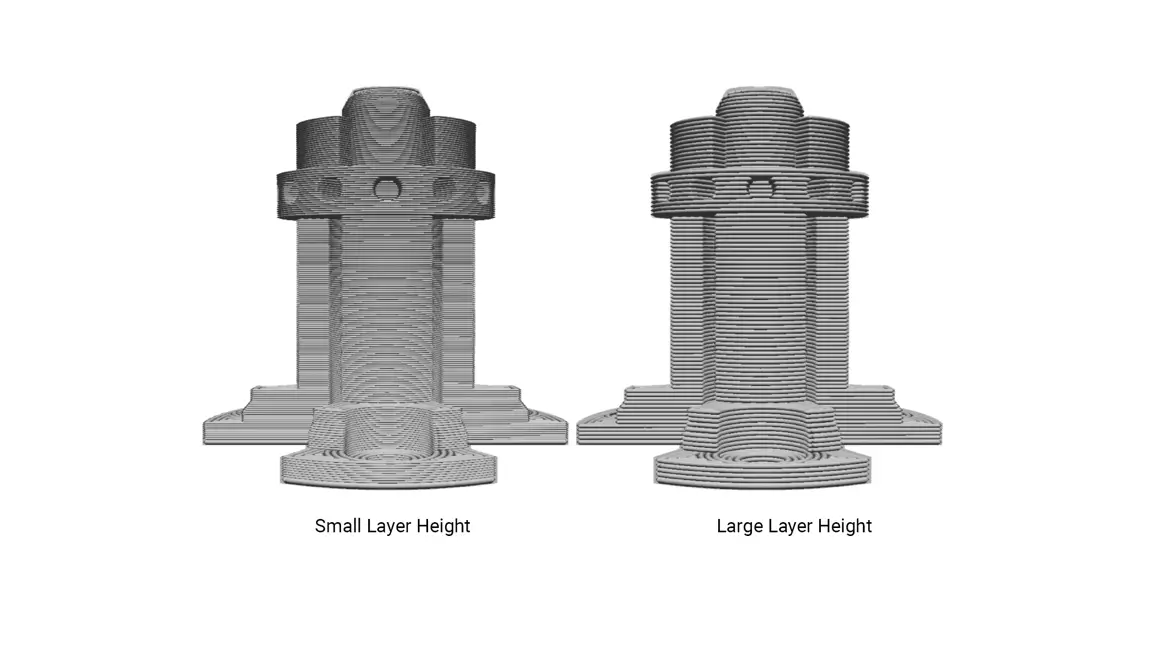
It sounds counter-intuitive, but larger layer heights (e.g., 0.24mm or 0.28mm instead of 0.12mm) actually improve clarity. A larger layer height means fewer total layers in the print. Fewer layers mean fewer curved surfaces to refract light.
How to Post-Process Prints for a Glass-Like Finish
If you have dialed in all the slicer settings above, you will have a remarkably dense, highly translucent part. But if you want it to look like actual glass, your 3D printer can only take you 80% of the way there. The final 20% requires post-processing to completely smooth out the exterior layer lines.
Wet Sanding and Polishing
The most traditional method is elbow grease. You must sand the exterior of your print to remove the curved ridges of the layer lines. Start with a coarse grit (like 200) and work your way up to a very fine wet sand (1000 to 2000 grit). Once the surface is completely smooth, use a plastic polishing compound and a buffing wheel to restore the shine. How to sand and smooth 3D prints requires patience, but the results are stunning.
Clear Coats (Polyurethane or Epoxy Resin)
If you don't want to spend hours sanding, you can fill the exterior ridges instead of removing them. Brushing on a thin layer of clear polyurethane spray, or a self-leveling clear epoxy resin, will fill in the valleys between the layer lines. Once cured, this creates a perfectly smooth, glassy exterior that allows light to pass through without scattering.
The Heat Gun Method
For advanced users printing with PETG, carefully passing a heat gun over the exterior of the print can superficially melt the outermost layer, causing it to smooth over the ridges. This requires extreme caution; too much heat will warp the entire part or cause the plastic to bubble.