Tree Supports 3D Printing: Guide to Cleaner Prints

If you have ever printed a complex model—like a miniature figure or a part with intricate overhangs—you are likely familiar with the frustration of removing standard supports. You spend hours prying off dense plastic scaffolding, only to find the surface underneath is scarred, rough, or completely ruined.
There is a better way. Tree supports (also known as organic supports) have revolutionized how we handle overhangs in 3D printing.
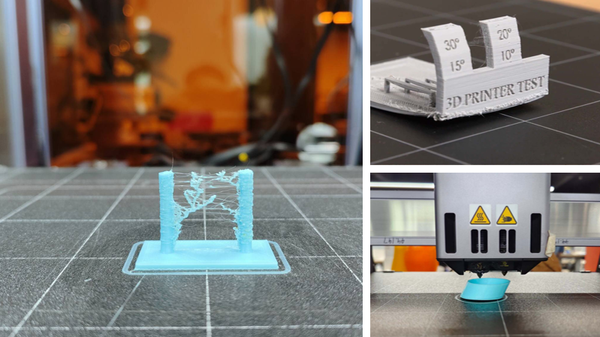
Instead of building a solid wall of plastic directly under your model, tree supports mimic nature. They grow "trunks" from the build plate that branch out to touch your model only exactly where necessary. The result? You use less filament, print faster, and most importantly, your prints come out with significantly cleaner surfaces.
Whether you are using Cura, PrusaSlicer, or Snapmaker Luban, this guide will help you master tree supports and say goodbye to ugly support scars.
What Are Tree Supports? (And Why You Should Switch)
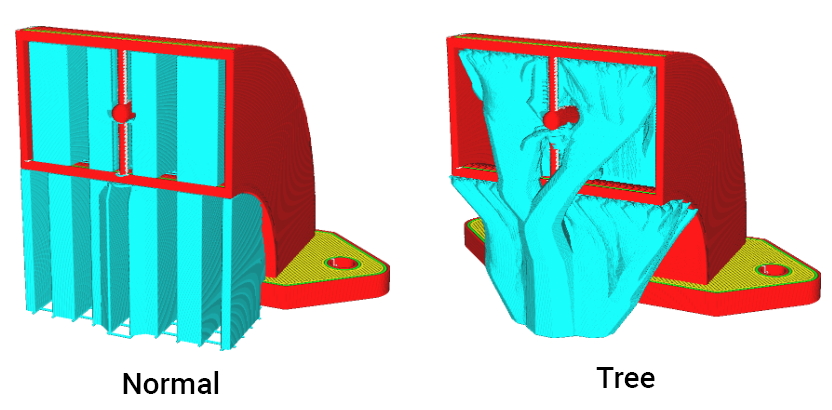
To understand why tree supports are superior, you have to look at how standard supports work. Standard (or "Normal") supports project a grid of plastic vertically from the build plate straight up to the overhang. This creates a massive contact area that is reliable but often fuses to your print, making it difficult to remove supports without damaging the model.
Tree supports work differently:
- The Trunk: Starts small on the build plate and grows upward, often winding around the model to avoid touching it.
- The Branches: As they near the overhang, they split into fine tips.
- The Contact: Only the very tips of the branches touch the model to support it.
Three Main Benefits
- Superior Surface Finish: Because the contact area is much smaller than Normal supports, there is less post-processing required. You can spend less time learning how to sand and smooth prints and more time printing.
- Less Wasted Filament: The trunks are hollow by default. On complex models, tree supports can reduce material waste by 25–50% compared to solid linear supports.
- Easier Removal: Instead of sawing through a solid block, you often just squeeze the hollow trunk, and the whole structure snaps away cleanly.
Decision Matrix: When to Use Tree Supports
While tree supports are powerful, they aren't the solution for every print. Use this quick guide to decide:
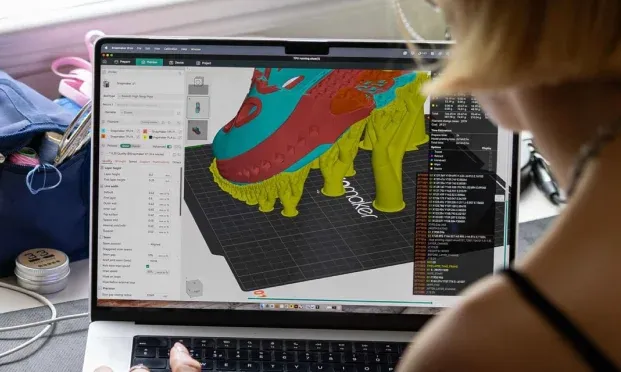
Key Slicer Settings for Success
Getting tree supports right requires tweaking a few settings. While terminology varies slightly between software, modern slicers (including Snapmaker Orca and Luban) share these critical parameters.
1. Branch Angle (40°–50°)
This controls how far the branch can lean outward.
- The Rule: If the angle is too steep, the branch might fail mid-print. A safe range is 40–50 degrees.
- Stability Note: If you are using a rigid machine with a heavy frame, you can often push this angle slightly higher because the stability reduces the vibration that causes leaning supports to fail.
2. Z-Distance (0.2mm)
This is the vertical gap between the top of the support and your model.
- The Sweet Spot: For PLA, a gap of 0.2mm (roughly one layer height) is standard.
- Why: This gap allows the hot filament to "rest" on the support without fusing to it. If your supports are impossible to remove, your Z-Distance is likely too small.
3. Trunk Diameter & Hardware Consideration
Tree supports can be tall and thin, making them prone to wobbling as the print gets higher.
- Bed-Slinger Adjustment: If your printer moves the bed back and forth (Y-axis), increase the trunk diameter. Excessive movement can cause ghosting or layer shifts, which may knock delicate trees over.
- CoreXY Advantage: On CoreXY machines or precise linear module printers (like the Snapmaker U1 or Artisan), you can generally get away with thinner trunks because the print remains stationary or moves more smoothly, reducing the risk of the tree toppling.
Troubleshooting Tip: If your tree supports are detaching from the build plate early, treat it like any other adhesion issue. Clean your bed or check out our guide on fixing prints that won't stick to the bed.
Advanced Technique: The "Dissimilar Interface"
For users with multi-extruder or tool-changing printers.
The ultimate way to use tree supports is to combine them with multi-material printing. If you have a device capable of handling multiple filaments—such as a tool changer 3D printer—you can use a technique that eliminates scarring entirely.
How it works:
- Print the Model and the main "Trunk" of the tree in PLA.
- Print only the "Interface" (the top layer of the support) in PETG.
Why this works: PLA and PETG do not chemically bond. The support interface will act as a perfect solid shelf for your model but will pop off with zero resistance once cooled. This is the "Holy Grail" of clean support removal.
How to Remove Tree Supports (Without Breaking Your Print)
Even with the best settings, removal requires care.
- The "Crunch" Method: Do not pull the tree straight off. Instead, use a pair of pliers to squeeze the main trunk. Since tree supports are hollow, the trunk will crunch and collapse, releasing the tension on the branches.
- Snip the Tips: For delicate miniatures, don't rip the branches off. Use flush cutters to snip the branch tips near the model, but not flush against it. You can sand the remaining nub down later.
- Safety First: Tree supports store energy. When they snap, small plastic shards can fly. Always wear eye protection during removal.
Final Thoughts
Tree supports are a fundamental skill for modern 3D printing. They allow you to print geometries that were previously considered "impossible" or too messy to attempt.
Open your slicer today. Take a model you have printed before using standard supports, and re-slice it using Tree Supports (in Luban) or Tree Organic (in Snapmaker Orca). Check the preview—you will likely see a reduction in material cost immediately.
FAQ: Tree Supports 3D Printing
Do tree supports use more filament?
Usually, no. Because the trunks are hollow, tree supports typically use 20-40% less filament than standard supports for complex models. However, for very dense, short overhangs, standard supports might be lighter.
Why do my tree supports fail mid-print?
This is often due to poor bed adhesion or the nozzle knocking the thin trunk over. Try enabling a "Support Brim" in your slicer or increasing the trunk diameter.
Can I use tree supports for ABS or PETG?
Yes, tree supports work well for ABS and PETG. However, be careful with flexible filaments like TPU, as the constant retractions required for tree branches can cause jamming.