How to Make 3D Prints Watertight: Settings, Materials, and Sealing
It’s a rite of passage for every 3D printing enthusiast: You print a beautiful vase or a custom planter, fill it with water, and admire your work. But an hour later, you find a small puddle forming at the base. Or worse—the "slow weep" that ruins your table over the course of a week.
Achieving a truly watertight 3D print with FDM technology is notoriously difficult. Because FDM printers build objects layer by layer, they naturally create microscopic gaps—thousands of tiny pinholes where layers meet.
However, with the right combination of materials, slicer settings, and post-processing, you can turn a porous print into a fully sealed, functional vessel. This guide will walk you through the exact process to stop the leaks.
Why Do 3D Prints Leak? (The Science of Layers)
Before fixing the problem, it helps to understand why it happens. Standard filament printing is inherently prone to leaking due to two factors:
- The "Zipper" Effect: Every time the nozzle moves to the next layer, it leaves a seam (the "Z-seam"). This vertical scar is the most common escape route for water.
- Micro-Gaps (The Stacked Log Analogy): Round plastic lines don't stack perfectly square. In cross-section, 3D printed walls look like stacked logs. The tiny diamonds of air between those "logs" form a network of capillaries that water can seep through.
Watertight vs. Waterproof: A Critical Distinction
It is vital to distinguish between these two terms:
- Watertight refers to the structure. Does the geometry hold water without leaking?
- Waterproof refers to the material. Will the plastic itself degrade, swell, or dissolve when exposed to water?
You can have a watertight print (it doesn't leak) made of non-waterproof material (it will eventually fail).
Select the Right Material for Water Resistance
Choosing the right filament is your first line of defense. While you can force almost any material to hold water, starting with the right chemistry makes the job significantly easier.
PETG (Polyethylene Terephthalate Glycol)
The standard choice. PETG is naturally water-resistant and hydrophobic. It has excellent layer adhesion (layers stick together better than PLA), which reduces the micro-gaps that cause leaks.
PP (Polypropylene)
The industrial standard. If you look at a Tupperware container or a shampoo bottle, it is likely made of PP. It is chemically superior for holding liquids. However, it is notoriously difficult to print due to warping. If you can master it, it is the best watertight material available.
TPU (Flexible Filament)
Excellent for seals. TPU has incredible layer adhesion—it is almost impossible to delaminate a TPU print. This makes it perfect for printing custom gaskets, seals, and flexible stoppers.
PLA (Polylactic Acid)
Use with caution. A common myth is that PLA will "biodegrade" immediately in water. In reality, it requires industrial composting conditions to rot. However, PLA is hygroscopic—it absorbs moisture. Over time, a PLA vase filled with water may swell, soften, or turn white (fogging), eventually leading to leaks. It is fine for quick prototypes, but poor for long-term use.
Configure Slicer Settings for Watertight 3D Prints
If you use standard "Draft" or "Quality" profiles, your print will leak. You must modify your slicer settings to force more plastic into the gaps.
Increase Wall Thickness and Bottom Layers
This is the single most effective change you can make. See our guide on Wall Thickness for a deep dive.
- Walls (Perimeters): Set 3 to 4 perimeters minimum. Water might get through the first wall, but a third or fourth wall usually stops the path.
- Top/Bottom Layers: Do not neglect the floor. Set 4 to 5 bottom layers. A watertight wall is useless if the base weeps.
Boost Temperature and Flow Rate
You want the plastic to melt thoroughly and flow into every crevice.
- Temperature: Increase your nozzle temperature by 5-10°C above your normal setting. This improves layer bonding.
- Flow Rate (Extrusion Multiplier): Increase to 105% - 110%. This deliberate "over-extrusion" forces extra plastic into the micro-gaps between layers. Learn more about Flow Rate.
Use a Larger Nozzle
If you have a 0.6mm or 0.8mm nozzle, use it. A thicker line width means fewer layers are required to build the wall, resulting in fewer seams (leak points).
Understand Vase Mode Limitations
"Vase Mode" (Spiralize Outer Contour) prints a continuous single wall, eliminating the Z-seam.
- The Good: It is excellent for simple, open-topped cylinders.
- The Bad: It cannot handle flat tops, complex geometries, or steep overhangs. Do not use Vase Mode for functional parts that require lids or mechanical features.
Design Your Model for Water Resistance 3D Prints
Sometimes, the leak isn't caused by the printer, but by the design itself.
Ensure the Model is Manifold
Your model must be "Manifold." A manifold model is a mathematically "watertight" mesh, meaning it has a continuous surface with no holes, gaps, or self-intersecting faces.
If your slicer warns of "non-manifold edges," use a repair tool (like Windows 3D Builder or Meshmixer) to patch the digital holes before printing.
Utilize Soluble Supports
Standard supports are a major cause of leaks. When you break off support material, you often leave small pockmarks or micro-fractures in the watertight skin.
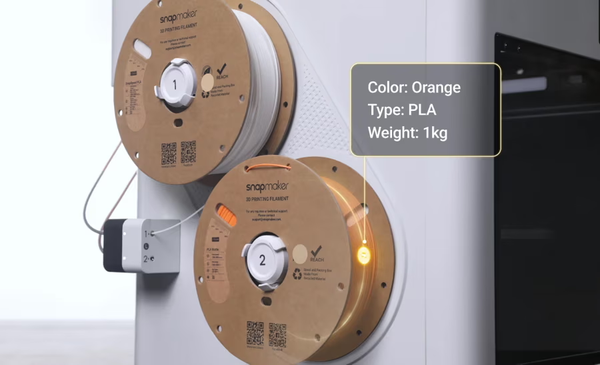
For complex geometries (like pipes or internal channels), breaking off supports is impossible without damaging the print. This is where the Snapmaker U1 3D Printer offers a decisive advantage.
As an advanced tool changer, the U1 can mount different extruders for different materials. You can print the main object in a durable material (like PETG or Nylon) and the supports in PVA (polyvinyl alcohol).
- The Process: The U1 swaps toolheads instantly to print the support interface. Because the toolheads are physically separate, there is no cross-contamination of materials in the nozzle.
- The Result: You simply submerge the print in water, and the supports dissolve. You are left with a pristine, watertight surface with no pockmarks or cracks from manual removal.
Seal Your 3D Prints for Total Security
If you absolutely cannot afford a leak (e.g., electronics housing or hydroponics), do not rely on the print alone. Seal it.
Apply Epoxy Resin
Coat the inside of your print with a thin layer of food-safe epoxy or XTC-3D. This fills every microscopic pore and guarantees a 100% seal.
Use Clear Acrylic Spray
For non-critical items (like flower pots), 2-3 coats of clear acrylic spray paint (matte or gloss) can seal the exterior effectively. See our guide on Painting 3D Prints for tips on surface prep.
Conclusion: The Path to Leak-Proof Prints
Making a watertight 3D print isn't magic; it's simply a matter of overcoming the physical limitations of FDM technology. By understanding that 3D prints are essentially "stacked logs," you can adjust your strategy to fill the gaps.
Remember the three elements of watertight printing:
- Material: Choose PETG or PP for natural resistance.
- Settings: Prioritize Wall Thickness (4+ shells) and Higher Temps over fancy infill patterns.
- Insurance: When in doubt, seal it with epoxy or acrylic.
With these adjustments, you can confidently print vases, planters, and functional parts that keep water exactly where it belongs—inside the print.
FAQ on Watertight 3D Printing
Can 3D printed items go in the dishwasher?
Generally, no. The heat of a dishwasher (often 60°C+) will warp PLA and even some PETG prints. Furthermore, the detergents can be abrasive. For more details on safety, read our Food Safe 3D Printing Guide.
How do I test if my print is watertight?
Don't just fill it and look. Place the print on a dry paper towel. Fill it with water and let it sit for 2-3 hours. If the paper towel underneath remains bone dry, you have a success. If the paper towel crinkles or shows damp spots, you have a "slow weep."
Is 100% infill necessary for watertight prints?
No. In fact, 100% infill can sometimes cause warping due to excess heat buildup, which causes leaks. It is better to have 4-5 thick perimeters (walls) and standard infill than a solid block of plastic.