10 Ways to Fix Your 3D Print Not Sticking to the Bed
There’s no feeling quite like the disappointment of returning to your 3D printer, excited to see your creation, only to find a tangled mess of plastic spaghetti. A print that won’t stick to the bed is one of the most common and frustrating hurdles in 3D printing, but the good news is that it’s almost always fixable.
Think of it as a tug-of-war. On one side, you have adhesion forces trying to hold your print firmly to the build plate. On the other, you have shrinkage forces from cooling plastic trying to pull it up and away. Your goal is simple: make sure adhesion always wins. This guide will show you exactly how.
First, let's diagnose the problem. What does your specific failure look like?
- Warping/Curling Corners: This is the most common issue, where the edges of your print lift away from the bed. It's a classic sign of shrinkage forces winning the battle.
- Complete Detachment: The entire print breaks free mid-print. This is often the final stage of severe warping.
- Poor Initial Lines: The very first lines of filament curl up and stick to the hot nozzle instead of the bed. This points to a fundamental issue right at the start.
- Elephant's Foot: The first few layers of your print bulge outwards. This isn't a failure to stick, but a sign that your nozzle is too close to the bed.
Once you’ve identified your issue, you can begin troubleshooting.
Quick-Fix Checklist: Try These 3 Things First!
In a hurry? More than 90% of bed adhesion problems can be solved with one of these three fundamental steps. Before you change a single setting in your slicer, start here.
- Clean Your Print Bed: The number one cause of sudden adhesion failure is a contaminated surface. Oils from your fingerprints, dust, or residue from old prints can prevent the filament from bonding. Wipe the cool bed thoroughly with a lint-free cloth and Isopropyl Alcohol (IPA) with a concentration of 70% or higher.
- Level Your Print Bed: An unlevel bed means the nozzle will be too far away in some spots and too close in others. The goal is to ensure the nozzle maintains a consistent distance from the build surface at every point.
- Check Your Z-Offset: This setting fine-tunes the nozzle's starting height. A perfect Z-offset creates the ideal "squish," pressing the first layer of filament onto the bed for a strong mechanical and thermal bond.
Comprehensive Troubleshooting: 10 Solutions for Perfect First Layers
If the quick fixes didn't solve your problem, don't worry. One of these more in-depth solutions will get you back on track. We’ll cover everything from simple settings to essential hardware upgrades.
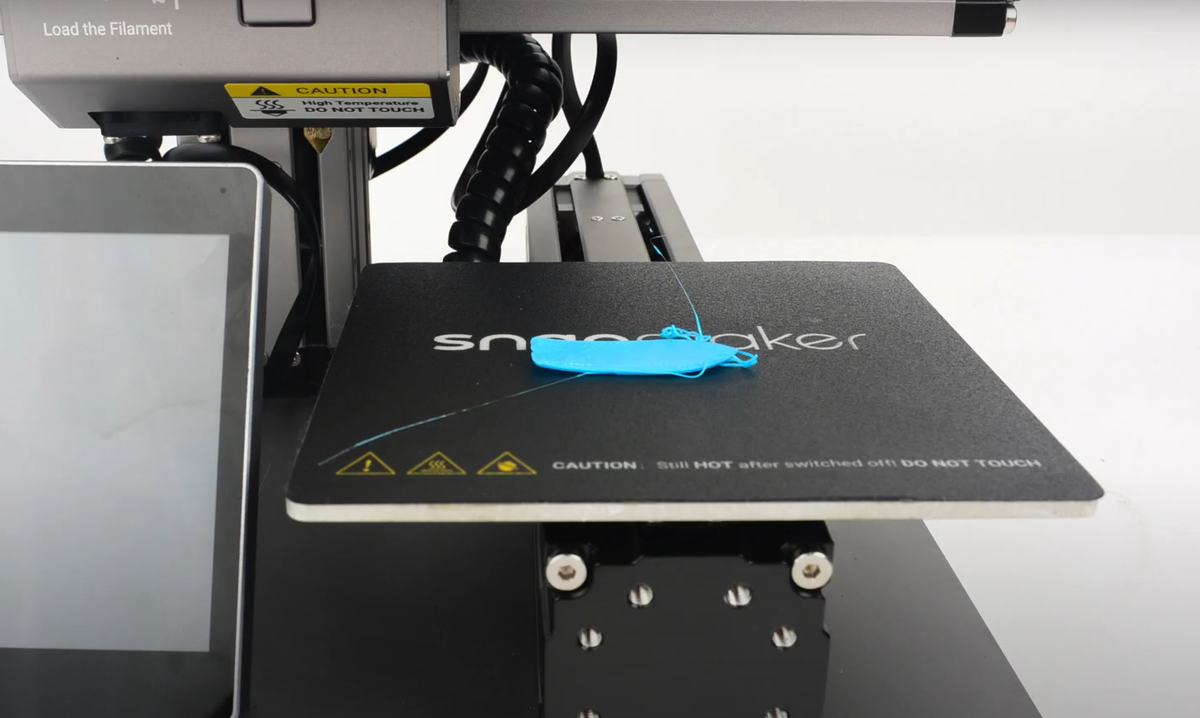
Solution #1: Master Your Bed Leveling

What to do: With both your nozzle and bed preheated to your target printing temperature (as materials expand when hot), move the nozzle to each corner of the bed. Use a standard sheet of office paper as a feeler gauge, adjusting the leveling knobs until you feel a slight, consistent drag on the paper at every corner.
Why it works: More accurately called "tramming," this process ensures your build plate is perfectly parallel (or coplanar) to the gantry's XY motion. This guarantees a consistent gap between the nozzle and the bed across the entire surface.
Pro-Tip: Achieving a perfect first layer is much simpler on printers with advanced automatic leveling. A machine like the Artisan, for instance, features a precise system that uses the nozzle itself to map the build plate. It gently taps the surface at multiple locations, using a photoelectric switch to register the exact height at each point. This process builds a highly accurate digital mesh to compensate for any minor warps—all without the need for a separate sensor probe.
It's important to remember that this automated process is most effective when it builds upon a solid foundation. Always perform a quick manual leveling (tramming) first to get the bed plane close to level. Then, let the Artisan's leveling system work its magic to create a truly perfect foundation for your print.
Solution #2: Dial in the Perfect Z-Offset
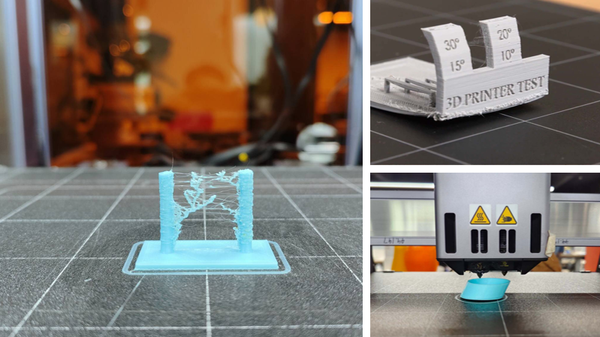
What to do: Start printing a large, single-layer test square. As it prints, use your printer's "Live Z-Adjust" function (or equivalent) to raise or lower the nozzle in tiny increments (0.05mm or less) until the extruded lines are perfectly flattened and fused together, with no gaps or ridges.
Why it works: The Z-offset dictates the amount of "squish." Too high, and the filament lays down a round bead that won't stick. Too low, and it gets squished into a transparent, overly-wide line. The perfect squish maximizes surface contact without deforming the print's dimensions.
Solution #3: Slow Down the First Layer
What to do: In your slicer software, find the "Initial Layer Speed" or "First Layer Speed" setting. Lower this value significantly to a range of 20-30 mm/s.
Why it works: A slower speed gives the molten filament more time in contact with the build plate. This allows for better heat transfer, promoting a stronger thermal bond, and reduces the pulling forces on the filament as the nozzle moves, giving it a chance to anchor itself securely.
Detailed guide: 3D Printing First Layer: Problems and Solutions; Understanding and Fixing 3D Printer Layer Shift
Solution #4: Adjust Your Temperatures
What to do: Ensure you are using the correct bed temperature for your material (e.g., 60-70°C for PLA, 100-110°C for ABS). For the first layer, consider increasing your nozzle temperature by 5-10°C above your normal printing temperature.
Why it works: A heated bed keeps the base of your print near its "glass transition temperature" (the point where it softens), preventing the plastic from cooling too quickly and shrinking. A hotter initial nozzle temperature lowers the filament's viscosity, allowing it to flow better and form a stronger bond with the surface.
Solution #5: Turn Off the Fan for the First Few Layers
What to do: Find the part cooling fan settings in your slicer. Set the fan speed to 0% for the first 1-5 layers. Most slicers have a specific setting for this, such as "Initial Layer Cooling."
Why it works: Rapid cooling is the enemy of bed adhesion. It causes "thermal shock," which maximizes shrinkage and stress. By keeping the fan off, you allow the first few layers to cool slowly and form a strong, stress-free bond with the bed before any aggressive cooling is introduced.
Solution #6: Optimize First Layer Dimensions
What to do: In your slicer's advanced settings, look for "Initial Layer Height" and "Initial Layer Line Width." Set the height to be slightly thicker than your other layers (e.g., 0.3mm for a 0.2mm print). Set the line width to be wider, around 120-150% of your nozzle diameter.
Why it works: A thicker, wider line is more robust. It has more thermal mass for a better bond and more surface area for superior grip. It’s also more forgiving of any tiny imperfections in your bed level.
Solution #7: Use a Bed Adhesion Helper

What to do: Apply a thin, even layer of a PVA glue stick, hairspray, or a specialized 3D printing adhesive to your build plate.
Why it works: These products create a tacky film that enhances the filament's mechanical grip. Critically, they can also act as a release agent, which is essential for materials like PETG that can otherwise bond permanently to surfaces like glass or smooth PEI, damaging them upon removal.
Solution #8: Choose or Upgrade Your Build Surface

What to do: Understand the properties of your build surface. A standard glass bed is very flat but almost always requires an adhesive.
Why it works: Different surfaces provide different levels of "mechanical interlocking." A textured surface gives the filament more to grab onto. For a major boost in reliability and ease of use, nothing beats a flexible PEI steel sheet, which grips tenaciously when hot and releases prints with a simple flex once it cools.
Solution #9: Keep Your Filament Dry
What to do: Store your filament in an airtight container with desiccant packs. For materials that are particularly susceptible to moisture (like PETG, Nylon, or old PLA), consider using a dedicated filament dryer.
Why it works: Many filaments are hygroscopic, meaning they absorb moisture from the air. When printed, this moisture instantly turns to steam, causing bubbles, poor extrusion, and weak bonds. The most reliable way to combat moisture is with a dedicated filament dryer, which restores your spools for flawless printing.
Detailed guide: How to Store and Dry 3D Printer Filaments
Solution #10: Use an Enclosure for Warp-Prone Materials
What to do: When printing with high-shrinkage materials like ABS, ASA, or Nylon, use a printer enclosure.
Why it works: An enclosure traps waste heat from the printer, creating a stable, warm ambient environment. This dramatically reduces the temperature difference between the printed part and the surrounding air, minimizing the thermal stress that causes these materials to warp violently.
Answering Your Questions (People Also Ask Section)
Why does my 3D print keep lifting or warping?
This is almost always due to thermal contraction (shrinkage). As the plastic cools, it shrinks, and this force pulls the corners of the print off the bed. The best solutions are to control your temperatures with a heated bed (Solution #4), turn off the cooling fan for the first layers (Solution #5), and use an enclosure for high-shrinkage materials (Solution #10).
Detailed guide: 3D Print Warping: Why It Happens and How to Fix It
Why is my PLA not sticking to itself?
This is a layer adhesion issue, which is different from bed adhesion. When layers don't stick together, the problem is usually related to the filament being unable to properly melt and fuse. The most common causes are printing too cold (increase nozzle temperature) or printing too fast (slow down your overall print speed).
Should I use a Brim or a Raft?
Both are excellent tools found in your slicer, but they serve different purposes.
- Brim: This should be your default choice. A brim adds a single-layer-thick border around your print, dramatically increasing its surface area on the bed to fight warping. It’s easy to remove and uses very little material.
- Raft: This is a "last resort" option. A raft prints a thick, disposable platform underneath your entire part. Use it only if your build surface is damaged or uneven, or if a part has tiny, difficult-to-stick contact points. Be aware that it uses significantly more material and time, and often leaves a rough finish on the bottom of your part.
Conclusion
Fixing bed adhesion isn't magic; it's a logical process of controlling your printer's environment. By starting with the basics—a clean, level bed—and then systematically adjusting your settings, you can overcome even the most stubborn adhesion problems. Remember the core principles: Calibrate your mechanics, control your thermals, and optimize your surface.