Tool Changer 3D Printers: Buyer's Guide to Speed, Quality, and Multi-Material Printing
Tool changer 3D printers are redefining the possibilities of multi-material printing. Unlike traditional designs, these advanced machines feature a system that can automatically swap between different tool heads during a single print job.
This core capability opens the door to creating complex parts with multiple materials and colors, without the common drawbacks of older multi-extruder systems.
As engineers in this field, we want to provide a clear guide for anyone considering this technology. This article explains how tool changers work, compares their mechanics to those of other systems, and outlines the key factors to consider when selecting the right machine for your needs.
How Tool Changers Compare to Other Multi-Material Systems
To understand the value of a tool changer, it’s helpful to see how its mechanics differ from other common approaches.
vs. Fixed Dual Extruder Printers
In a conventional dual extruder setup, both nozzles are mounted on a single, shared carriage. This means the weight of both extruders is constantly moving, and the inactive nozzle remains in close proximity to the print, which can lead to challenges with oozing and print quality.
vs. Single-Nozzle Multi-Filament Printers
These systems, often known as AMS (Automatic Material System) or MMU (Multi-Material Unit) style printers, use a single nozzle and feed different filaments into it as needed. To switch materials, the previous filament must be fully retracted and the new one loaded. A "purge block" or waste "poop" is often required to clear out any residual color from the shared melt zone, a process that can be time-consuming and generate significant material waste.
The Tool Changer Approach
A tool changer system operates differently. It uses a single, lightweight carriage that docks the inactive tool head at a designated station outside the print area before picking up the next one. Only the active tool is carried over the print, effectively isolating it from the others.
Key Factors to Consider When Buying a Tool Changer
Evaluating a tool changer involves assessing several key areas, from your specific goals to core engineering principles. Here are the critical factors to consider.
Intended Use & Application

Before diving into technical specifications, define your primary goals. Are you aiming for:
- Multi-color printing for detailed aesthetic models and prototypes?
- Multi-material printing for functional parts combining different properties, like a rigid frame with flexible TPU gaskets?
- Printing with soluble supports for creating complex geometries that would otherwise be impossible to print cleanly?
Your intended use will guide which other factors you should prioritize.
Print Performance: Quality, Speed, and Efficiency
This is where the theoretical advantages of a tool changer become tangible results.
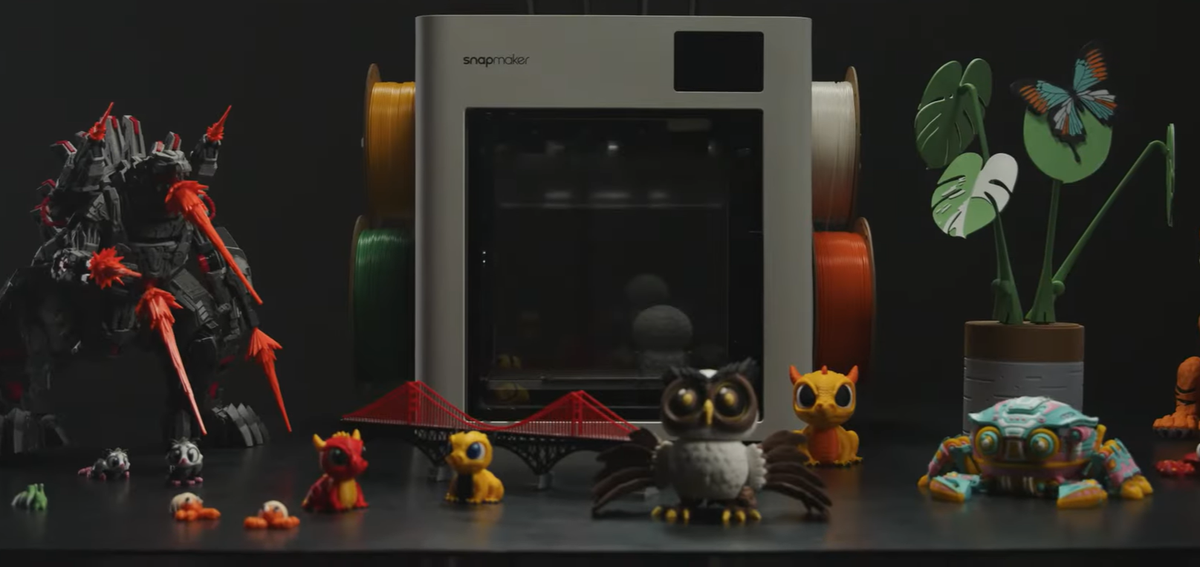
Print Quality & Material Efficiency: A major advantage of parking inactive tools is the elimination of ooze. The most advanced systems perfect this by ensuring each tool head is actively sealed when docked. This prevents material contamination and allows for multi-color printing without wasteful purge blocks, saving both time and filament. For instance, the Snapmaker U1 was engineered with this zero-purge capability.
Speed and Acceleration: Because a tool changer carries only one lightweight tool at a time, it has significantly less moving mass (inertia) than a traditional dual extruder. This allows for higher acceleration and printing speeds without introducing vibration artifacts like "ringing" or "ghosting." This is how modern tool changers can reach print speeds of 300 mm/s, travel speeds of 500 mm/s, accelerations of 20,000 mm/s², and a max flow rate of 32mm³/s, dramatically reducing print times.
Software, Firmware, and Ease of Use
Advanced hardware is only as good as the software that controls it.
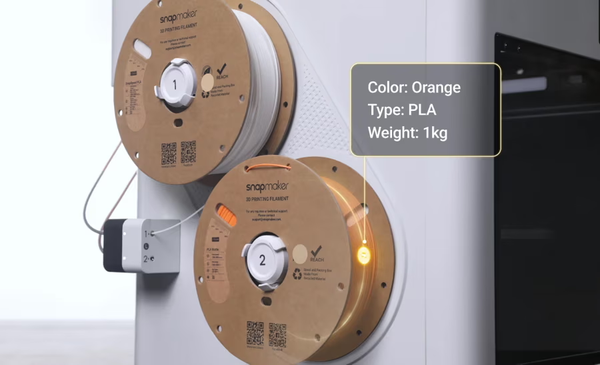
Integrated Workflow: The complexity of managing multiple tools should be handled by the software, not the user. Look for a seamless ecosystem, from the slicer to the machine. A feature like Filament RFID Recognition, which automatically identifies materials, can greatly streamline setup.

Automatic Calibration: Manually calibrating tool offsets is a tedious and error-prone process. A user-friendly system will feature a suite of automatic compensations. For example, the U1 automates this with Automatic Toolhead Offset Calibration, Vibration Compensation, and Pressure Advance Compensation to ensure accuracy without manual tuning.
Streamlined Slicer: The slicer software should make it intuitive to assign different materials to different parts of a model and then generate the corresponding toolpaths automatically. For example, the Snapmaker App is designed to manage the U1’s entire workflow, simplifying multi-material setup and enabling a one-click printing process.
Practical Considerations
Budget: Tool changers are an investment, with prices generally reflecting their complexity and capability. Factor in not just the upfront cost, but also long-term value from material savings (due to no purging) and increased productivity. If you’re new to 3D printing, check out our beginner’s buying guide.
Build Volume: Be aware that the tool docking station will occupy a portion of the machine's overall footprint. Always check the effective build volume to ensure it meets the size requirements for your projects.
More Than Just Color: Advanced Tool Changer Applications
While multi-color printing is a primary benefit, the true potential of a tool changer lies in its advanced fabrication capabilities.
From Colorful to Functional, Multi-Material Printing
True Multi-Material Parts: The ability to seamlessly combine materials with different properties, like a rigid chassis with integrated flexible grips, is a core strength of this technology. Furthermore, a robustly built system with a high-temperature hot end, like the U1, is not limited to basic plastics. It has the capability to print with demanding, high-performance engineering materials like Polycarbonate (PC), Nylon (PA), and even Carbon Fiber composites (PA-CF), opening the door to creating truly functional, high-strength parts.
Flawless Complex Geometries: Use a dedicated tool head for soluble support material. This allows you to print parts with extreme overhangs and intricate internal channels, then simply dissolve the supports away to reveal a perfect surface finish.
Optimized for High-Speed Quality: The challenge with printing fast is often a loss of surface quality. Advanced systems address this with motion control algorithms. By using features like Vibration Compensation and Pressure Advance, a system like the U1 can maintain sharp corners and smooth surfaces even while operating at high speeds, ensuring you don't have to sacrifice detail for a faster print time.
Dive Deep: Multi Material 3D Printing: What It Really Is, Why It’s So Hard, and How to Do It Right
Conclusion
Choosing the right tool changer 3D printer comes down to evaluating its core engineering. By focusing on its ability to print cleanly without waste, its motion system dynamics, and its level of software integration, you can make a well-informed decision.
We hope this guide has provided a valuable framework for your research. Curious to see a real-world example? Check out the Snapmaker U1 and explore what’s possible:
Snapmaker U1: Next-Gen Multi-Color 3D Printer Awaits
Frequently Asked Questions
How much faster is a tool changer than a regular printer? While the tool change itself adds a few seconds, the ability to use a lightweight print head allows for much higher speeds (up to 500 mm/s) and accelerations (up to 20,000 mm/s²). For prints with large volumes, using a larger nozzle for infill can also result in significantly faster print times overall.
Are tool changer 3D printers reliable? High-quality tool changers are designed for reliability. Look for systems with built-in anomaly detection, such as sensors that can detect a failed tool swap or filament jam, allowing the machine to pause and alert the user instead of failing the print.
Do tool changers actually save filament? Yes, significantly. Compared to single-nozzle multi-filament systems that require large purge blocks to clear out colors, a tool changer with sealed, non-oozing nozzles creates virtually zero material waste during material changes. This can lead to substantial cost savings, especially on complex prints.
What software is needed for a tool changer? You need a slicer that is fully integrated with the machine's hardware and firmware. A comprehensive ecosystem, like the one provided by the Snapmaker App for the U1, handles all the complexity of generating tool-changing commands, managing material profiles, and sending the print to the machine seamlessly.