How to Use a CNC Machine
CNC machines are no longer just for industrial setups. In recent times, desktop CNC machines have been slightly gaining popularity, and therefore, it is easier, cheaper, and most accessible to manufacture from home. Nowadays, CNC machines enable die-hard DIYers, craftsmen, and small-scale business people to get their custom prints right in their home or workshop.
Understanding what a CNC router is and how it works is essential before you proceed with CNC machine operations. This manual also serves as a comprehensive guide to CNC machine operation from start to finish.
What can you make with a CNC machine?
The possibilities are endless with a CNC machine. Thanks to its diverse compatibility of materials, you can create tons of custom creations. Here’s what you can make with a CNC machine:
From Wood, You Can Create:
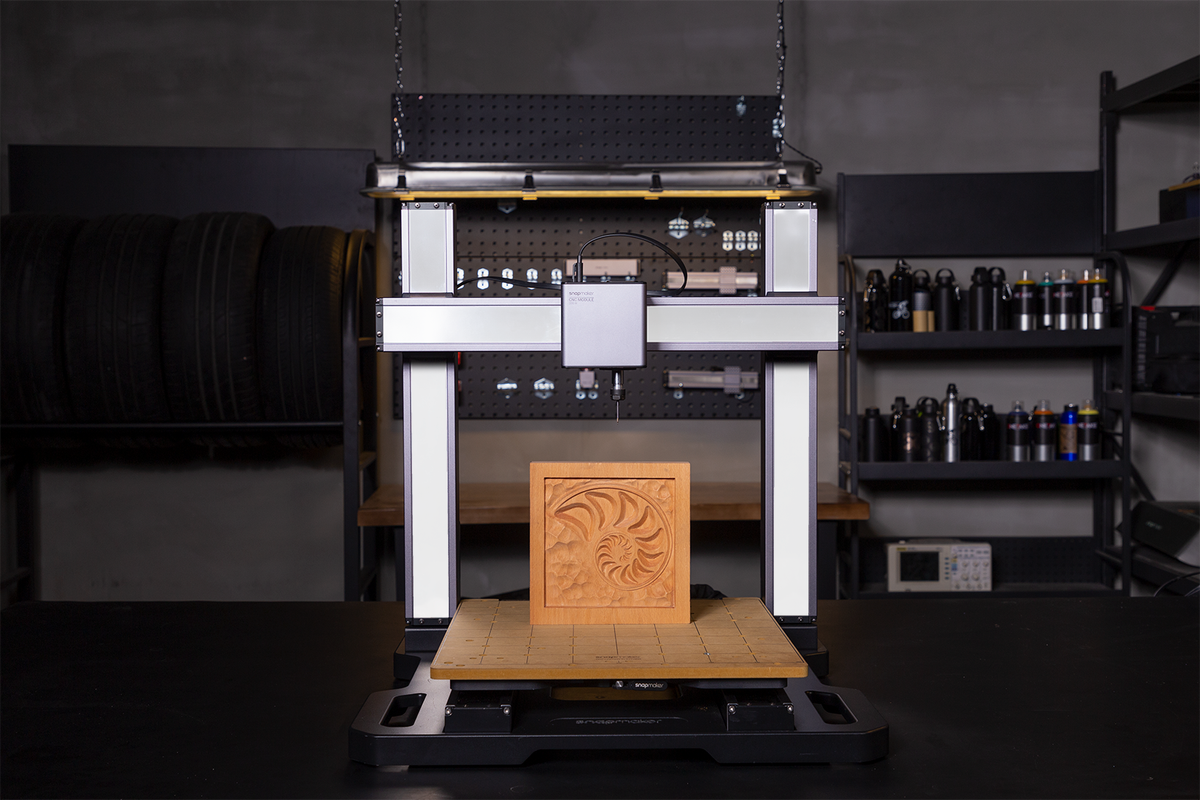
- CNC machine for woodworking: Engraved signs, personalized coasters, intricate wall art, wooden ornaments.
- Functional Items: Cutting boards, wooden spoons, furniture components (like small shelves or decorative legs), custom boxes.
- Crafting Aids: Stamps for leather or other materials, molds for casting.
From Plastics (Acrylic, Delrin, ABS, etc.), You Can Produce:
- Enclosures: Custom cases for electronics, protective covers.
- Signage and Displays: Laser-cut signs, promotional items.
- Artistic Elements: Colorful abstract shapes, custom templates.
Using Soft Metals (Aluminum, Brass, Copper), You Can Fabricate:
- Jewelry Components: Metal charms, intricate designs for pendants or earrings.
- Small Tools and Hardware: Custom wrenches, standoffs, knobs.
- Engraved Metal Items: Personalized tags, decorative plates.
What are the steps of using a CNC machine?
Ready to carve your design? Follow the steps below on how to use a CNC machine. These are general steps. The specific procedure may vary depending on the type of CNC machine (such as a router, mill, or lathe), the controller software, and the project’s complexity.
Step 1. Design and Prepare Your File
Create or Import Design: You can create designs directly in Snapmaker Luban's CAD workspace or import designs in common formats like SVG, DXF, or STL (for 3D carving). Refer to the Snapmaker Luban Manual for details on design tools and import options.
Set Up CNC Toolpath: Switch to the CNC workspace in Luban. Here, you'll configure the cutting parameters:
- Select Tool: Choose the appropriate router bit from the Luban library or create a custom tool profile, considering the material and desired cut.
- Set Processing Mode: Choose from options like Contour, Pocket, or other available strategies based on your design. The manual will explain these modes in detail.
- Define Parameters: Input parameters such as cutting depth, feed rate (how fast the tool moves horizontally), plunge rate (how fast the tool moves vertically into the material), step down (depth per pass), and spindle speed (RPM). These values will depend on the material and the chosen router bit you use. The Luban manual likely provides recommended settings for common materials.
- Generate Toolpath: After setting parameters, send them to Luban to generate the toolpath so that it can show you the movements the router bit will take.
Simulate: Use the simulation feature that Luban provides to visualize the cutting process before sending it to the machine so that errors and optimization areas can be identified.
Step 2. Prepare Your CNC Machine for CNC Routing
Attach the CNC Module: Ensure that the module for CNC carving is attached firmly to your Snapmaker machine.
Install the Router Bit: Place the selected router bit inside the collet of the CNC module and tighten it firmly using the provided wrenches.
Secure the Workpiece: Place your material upon the CNC worktable, keeping it firmly then, using clamps, ensure the material is flat and cannot shift during the carving process.
Step 3. Transfer and Run the CNC Job
Connect to Snapmaker: Connect your computer running Luban to your Snapmaker machine via USB or Wi-Fi.
Send to Machine: In Luban, click the button to send the generated G-code to your Snapmaker.
Set Work Origin: On the Snapmaker's touchscreen interface, you will need to set the work origin. This aligns the starting point of your digital design with the physical location of your material on the worktable. You'll typically move the router bit to your desired starting position and then set the X, Y, and Z axes to zero.
Start Carving: The process for CNC carving can be initiated through the touch screen after the origin of the workstation is set.
Monitor the Process: Be observant of the carving process with the machine; be ready to stop or put on hold the job whenever you notice something unexpected.
Step 4. Post-Processing
Remove the Workpiece: After your carving is done, carefully remove it from the worktable.
Clean Up: Clean all sawdust and debris from the workpiece and the CNC module.
CNC Woodworking with Rotary Module: Practical Guide

Design Considerations for Rotary Woodworking
When approaching rotary CNC woodworking, consider these practical design elements:
- Project scope: Focus on smaller three-dimensional artworks like figurines, decorative handles, rolling pins with patterns, or small hollow containers
- Design limitations: Be mindful of undercuts that tools cannot reach when designing for cylindrical rotation
- CAD preparation: Use software that can visualize your design wrapped around a cylinder for accurate planning
Setting Up Your Workpiece
Wood selection and preparation:
- Choose straight-grained wood with minimal knots for best results
- Pre-cut your stock to approximate dimensions before mounting
- For softer woods, consider using soft jaws to prevent marking the surface
Mounting the wood:
- Center your blank carefully in the chuck jaws
- Tighten jaws evenly to ensure secure grip without damaging the wood
- For longer pieces, use additional support at the tailstock end if available
Software Setup for Rotary Machining
Rotary mode configuration:
- Enter the exact diameter of your wooden blank for accurate calculations
- Select the appropriate wrapping method based on your 3D model
- Define how your design maps to the cylindrical surface
Tool selection for wood:
- Roughing: 3-6mm flat end mill for bulk material removal
- Medium detailing: 2-3mm ball end mill for curved surfaces
- Fine detailing: 1-2mm ball end mill or V-bit (15-30°) for intricate details
Wood-specific cutting parameters:
- Soft woods (pine, cedar): Feed rate: 600-800 mm/min; Spindle speed: 12,000-16,000 RPM
- Hard woods (oak, maple, walnut): Feed rate: 400-600 mm/min; Spindle speed: 16,000-20,000 RPM
- Step down: 0.5-1.0mm for roughing, 0.2-0.3mm for finishing
Note: Refer to the recommended parameters for the 200W CNC module for starting points, and adjust based on your specific wood type.
Running Your Project
Origin setting:
- Define the center point for the rotary axis
- Set Z-axis origin to the surface of your wooden blank at a known rotational position
Process monitoring:
- Watch for signs of the bit struggling in inconsistent wood grain
- Listen for excessive vibration or unusual noises
- Implement dust extraction to maintain visibility and cleanliness
Multi-pass approach for wood:
- Begin with roughing passes to remove bulk material
- Progress to medium detailing passes
- Finish with fine detailing passes
- Consider manual sanding between operations for best results
Advanced Techniques
Utilizing precision capabilities:
- Use 0.1° minimum angle rotation for ultra-fine details
- Leverage continuous rotation for seamless patterns around the full circumference
- Apply variable-depth cutting for relief effects
Project-specific strategies:
- For figurines: Work in sections, rough out the overall form before detailing
- For patterned cylinders: Use indexing to create repeating elements
- For hollow items: Consider internal support strategies during machining
Finishing woodwork:
- Sand progressively (120-220 grit) between machining operations
- Apply appropriate wood finish after CNC work: mineral oil for food-safe items, polyurethane for durability, or wax for decorative pieces
Conclusion
CNC machines have really made it easier for hobbyists and small business owners to bring their custom designs to life. From decorative pieces to jewelry components, you can practically create anything you like.