How to Paint 3D Prints: Advanced Techniques for a Flawless Finish
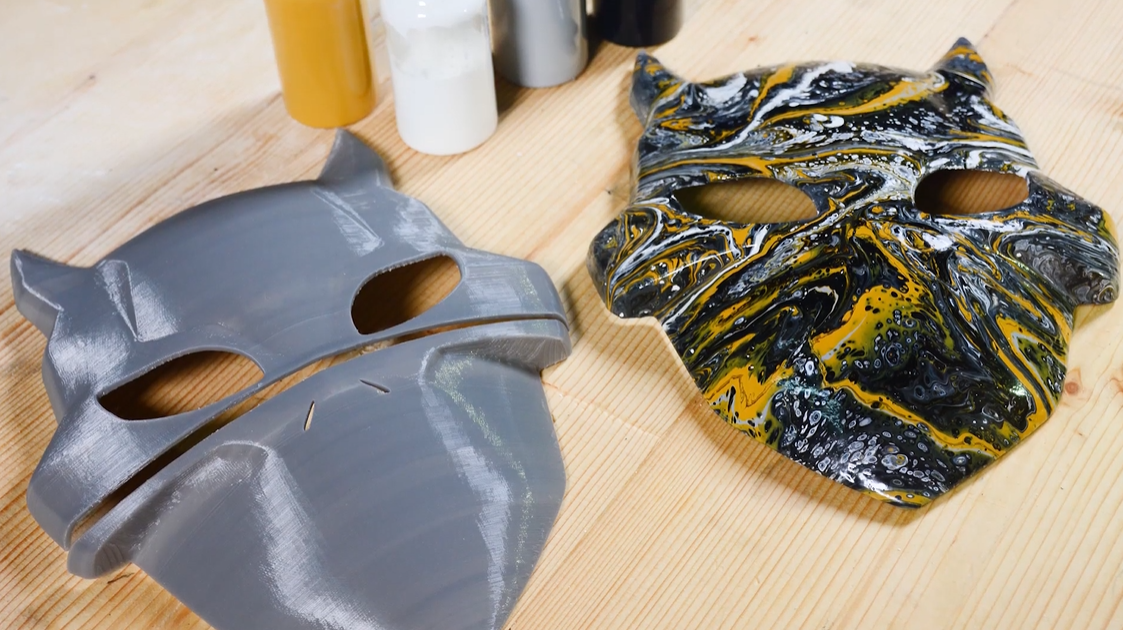
So, you finished your 3D print. Looks nice, right? But let’s be honest, it’s still kind of plain until you give it some color. First things first: prep it. Remove supports, sand rough spots, and wipe dust.
If you’ve done sanding, good job, you’re ready for the fun part: Priming, Coloring, and Sealing. Each step matters. Skip one, and it shows. Try things out; even a small PLA figure can go from ‘meh’ to ‘wow’ with the right paint. Let’s learn more about how to paint 3d printed figures.
Phase 1: The Foundation - Choosing the Right Primer
Primer is your best friend. No primer, no good paint job. Think of it as glue and a smooth bed rolled into one. Skip it, and your paint will blotch or soak in weirdly. A primer for 3d prints also helps you see small imperfections you might have missed while sanding.
If your print has layer lines, like PLA or ABS, go for a high-build or filler primer. It fills tiny bumps and scratches and saves tons of sanding later. Smooth resin or detailed PLA pieces? Standard primer works better. It sticks without hiding the details you spent hours crafting.
- Spray in a ventilated spot.
- Multiple thin coats beat one thick blob every time. Don’t rush it.
- Want silky smooth? Lightly sand between coats with 600-grit or higher.
A little effort here pays off big. Your paint glides on, edges stay crisp, and the whole process feels easier. Plus, it’s kind of satisfying to watch a dull gray primer turn into a smooth canvas ready for color.
Phase 2: Color Strategy - Selecting Your Paint
Acrylics are the easiest. PLA, ABS, resin, they all play nice. Quick-dry, clean up with water, and you can layer them without cracking. Hobby brands like Vallejo or Citadel give thicker pigments, which really make details pop. If you want a brighter miniature or more vibrant prop, they’re worth it.
Enamels are tougher and last longer. Perfect for parts that get handled a lot, but cleanup takes mineral spirits, and drying takes patience. Worth it for durability, especially on props or functional pieces.
Phase 3: Application Methods
Brushes are best for small details and miniatures. Soft synthetic brushes glide smoothly over surfaces and make it easy to reach intricate corners. They’re perfect for highlights, subtle accents, or realistic weathering effects. For optimal control, it's helpful to switch between two brush sizes depending on the level of detail—smaller brushes for precise lines and slightly larger brushes for broader strokes.
Spray cans are ideal for quickly coating larger surfaces such as props, enclosures, or display models. Always choose a spray designed for use with plastic and apply it in light, even passes while keeping the can in motion. This helps avoid drips and uneven patches. Using a piece of scrap cardboard or similar material beneath is a great way to keep the work area clean and catch any overspray.
Airbrushing is the pro move. Thin paint flows evenly and keeps textures alive. Great for gradients, soft fades, curves, and delicate resin prints. Adjust air pressure and paint flow to suit the print. Takes practice, but once you get it, your prints suddenly look studio-quality. Even a small PLA mini can feel like a real collectible when done right.
Phase 4: Pro-Level Techniques (The Value-Add)
Technique 1: Dry Brushing
Dry brushing is so satisfying. Take a stiff brush, barely any paint, wipe most off, then skim over raised edges. Instantly highlights textures. Rocks, metals, weathered props; they pop. Dry brush slowly at first, then faster once the right amount of paint sticks
Technique 2: Washes and Pin Washes
Washes add shadows. Thin, dark paint flows into grooves and crevices. Wipe flat surfaces so only the recesses hold color. Pin washes work for tiny details or panel lines, giving depth without touching surrounding areas. Mixing different wash colors can create subtle effects. Small experiments can provide significant results.
Technique 3: Masking for Precision
Masking keeps lines clean. Painter’s tape or liquid mask works for stripes, panels, or multi-color props. Paint over it, then peel while slightly tacky so nothing pulls. Little tricks like lifting the tape at an angle help avoid peeling and uneven edges.
Use these tricks, and your print looks real. Even small figures look detailed. Don’t sweat mistakes; small quirks often add character. Play, test, learn. That’s what makes painting fun.
Phase 5: The Seal - Protecting Your Work
Sealing locks in your paint and keeps it safe. Matte seal for 3D prints hides tiny mistakes and looks natural. Gloss pops and shines; great for shiny props or cars. Satin is the in-between, soft glow without glare. Thin layers, let each dry.
Put on two thin coats, not one thick coat. This keeps your print safe from scratches, dust, and sun. It helps it look nice for a long time.
Conclusion
By mastering the science of priming, the art of color choice, and the techniques of a pro—like dry brushing and precision masking—you have officially transformed a raw 3D print into an artisan-quality piece.
Now, it’s time to take these professional-level finishing techniques and apply them to your next project. We can't wait to see the incredible results you achieve with your Snapmaker. Share your finished, professionally painted Snapmaker projects with our community!