How to 3D Print Multiple Colors: The 4 Main Methods Explained
Multi-color 3D printing has evolved from a niche technique to an essential capability for creators, engineers, and hobbyists. Whether you're designing eye-catching prototypes, functional parts with color-coded features, or artistic models that demand visual impact, understanding the various approaches is crucial. This guide covers everything from the core technology to practical tips for bringing your most colorful visions to life.
A Quick Comparison of Multi-Color Methods
| Method | Key Feature | Primary Advantage | Main Drawback | Colors |
|---|---|---|---|---|
| Single Extruder | One nozzle prints colors via manual swaps or an automated feeder (AMS/MMU). Manually pausing and swapping filament by layer. | Universally accessible (manual) or automated convenience (AMS). Zero extra cost, works on any printer. | Labor-intensive (manual) or high filament waste from purging (AMS). Labor-intensive and very limited. | 1 (at a time) |
| Fixed Dual Nozzle | Two nozzles on a single, shared print head. | Automated two-color & soluble support printing. | Risk of oozing; requires wasteful prime towers. | 2 |
| IDEX | Two independent print heads that park when inactive. | No oozing for high-quality prints; adds special production modes. | More mechanically complex than fixed nozzles. | 2 |
| Tool Changer | Automatically swaps between multiple tool heads. | Near-zero filament waste, high speed, and multi-material capability. | Most advanced and highest initial investment. | 4+ |
1. Single Extruder Method (Manual Swaps & Automation)
This is the most universal method, relying on the foundational technology of almost every FDM 3D printer: a single extruder feeding filament through a single nozzle. There are two ways to achieve multi-color prints with this method.
The Technology: One filament path, one drive system, one nozzle.
1) Manual Swaps
This technique, often called "Pause at Height," is controlled through your slicer software. You insert a command that pauses the print at a specific layer. The printer stops, moves the print head aside, and allows you to manually retract the old filament and load a new color.
The Trade-Off: While universally accessible, this method is labor-intensive and limited to simple, layer-by-layer color changes. It's an excellent way to learn the fundamentals but isn't practical for complex models with intricate color details on the same layer.
Best For:
- Beginners taking their first step into multi-color printing.
- Models with simple, distinct horizontal color bands (e.g., text on a base).
2) Automated Systems (AMS/MMU)
To overcome the tedious nature of manual swaps, automated systems were developed. Commonly known by acronyms like AMS (Automatic Material System) or MMU (Multi-Material Unit), these devices act as robotic filament feeders for a single-nozzle printer. They connect multiple spools and automatically load and unload different colors as needed.
The Trade-Off: The main challenge with this approach is the significant material waste. To ensure a clean color transition, the printer must push out, or "purge," all of the old color from the shared hotend. This purged filament is typically collected in a "purge block" or ejected as waste, a process that can be both time-consuming and costly, especially on prints with many color changes.
Best For: Users seeking automation for complex multi-color prints on a single-nozzle machine who accept material waste as a trade-off.
2. Multi-Extruder Method (Fixed Dual Nozzles)
The next step in automation involves a printer equipped with two nozzles mounted together on a single print head. This is a common setup for a multi spool 3d printer designed for two-color jobs.
The Technology: A single print carriage that holds two separate nozzles, each with its own filament feed.
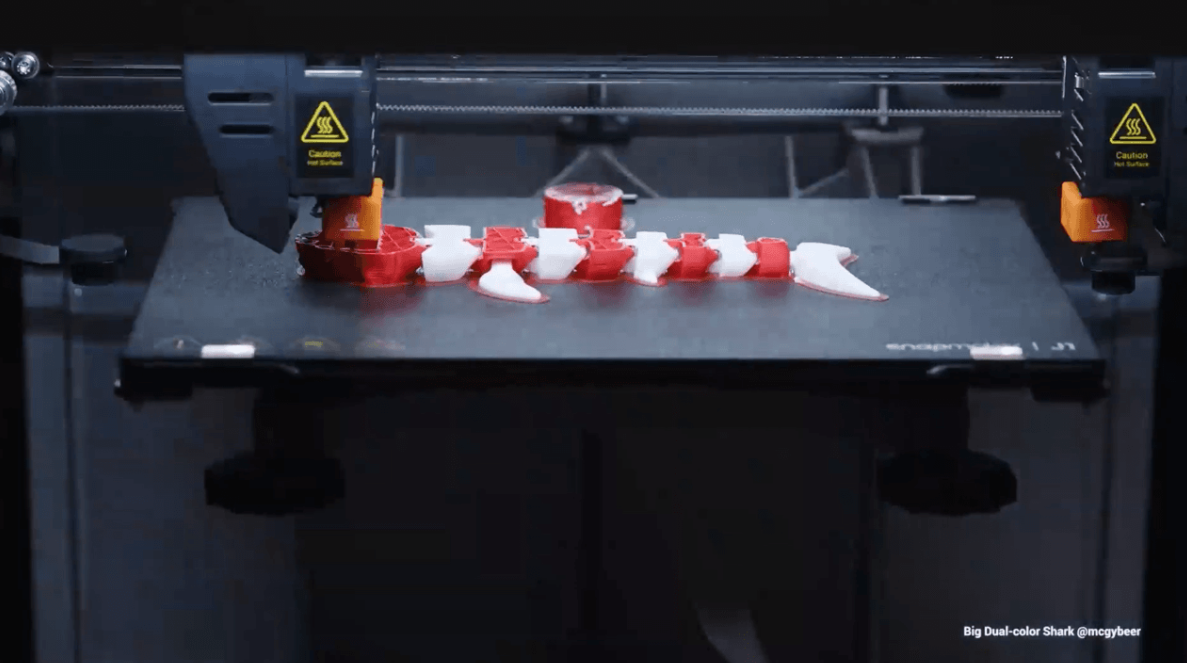
The Process: You assign each color in your design to one of the two nozzles. The machine then switches between them as needed. However, this introduces a key challenge: oozing. The inactive nozzle remains hot and can drip filament onto the print. To prevent this, printers use "prime towers" or "ooze shields"—extra structures printed alongside the model to wipe the nozzle clean before it prints.
Best For:
- Automated two-color or two-material prints without manual intervention.
- Printing complex geometries with soluble supports.
A refined example of this technology is the Snapmaker Artisan with its Dual Extrusion Module. It leverages a dual-nozzle system to produce intricate two-color models, pairing standard materials with specialized supports to overcome design limitations.
3. IDEX Method (Independent Dual Extruders)
IDEX represents a major leap forward, solving the core challenges of a fixed dual-extruder setup with an elegant engineering solution.
The Technology: Two extruders on two truly independent print heads, each capable of moving separately along the X-axis.
The Process: The independence of the print heads is the key. When one nozzle is printing, the other is "parked" completely off to the side. This physical separation eliminates oozing and cross-color contamination. Furthermore, this architecture unlocks powerful production modes:
- Mirror Mode: Prints a model and its symmetrical counterpart at the same time.
- Duplication Mode: Prints two identical models simultaneously, doubling your output.
Best For:
- Achieving the highest quality, sharpest multi-color prints.
- High-efficiency production and small-batch manufacturing.
The Snapmaker J1s is engineered to master IDEX technology, fully utilizing its independent extruders to deliver flawless multi-color models at incredible speeds.
4. Tool Changer Method (Automated Tool Selection)
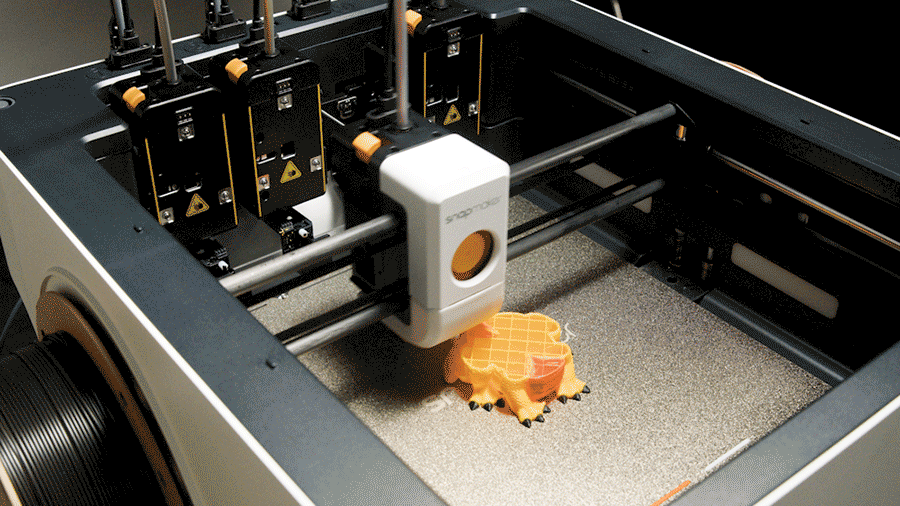
We now arrive at the most advanced category, where a printer automatically selects the right "tool" for the job from a pre-loaded arsenal. This modern approach redefines "tool changing" with sophisticated, software-driven automation.
The Technology: A system that intelligently switches between multiple independent extruders, each acting as a distinct and selectable tool.
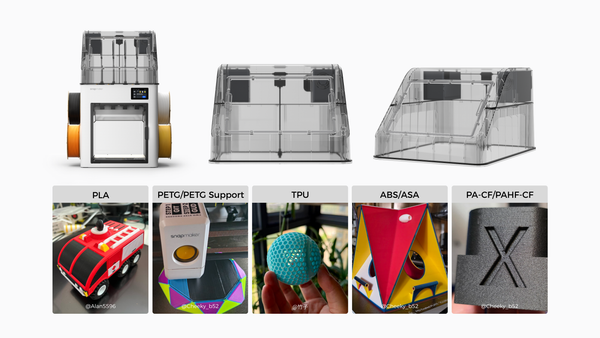
The Process: The Snapmaker U1, with its advanced SnapSwap™ system, embodies this technology. It is equipped with four independent extruders, meaning each of the four loaded filaments is managed by its own dedicated drive system. This provides unparalleled control over filament handling. To manage the complexities of four tool heads operating at high speed, the U1 introduces a series of advanced compensation algorithms, ensuring prints are smooth and dimensionally accurate right out of the box. When the print requires a color change, the system instantly calls upon the precise "tool" required. This process eliminates the "Purge Problem" common in simpler automated systems. With a tool changer, there is near-zero waste.
Best For:
- Near-zero waste tool swapping helps save significant material costs.
- High-speed printing capabilities dramatically reduce waiting time.
- Ideal for intricate multi-color and multi-material parts.
Software: The Digital Key to Color
The success of any multi-color print depends heavily on powerful software. Modern slicers make complex preparations accessible to everyone.
- Color Painting Tools: Gone are the days of splitting models manually. Modern software allows you to "paint" colors directly onto your model's surface, automatically generating the separate parts for printing.
- Intelligent Slicing: Software like Snapmaker Luban manages the entire workflow, from assigning colors to different extruders to generating the G-code that controls tool changes. With a history of consistent updates adding new features and bug fixes, the software is continuously refined for a better user experience.
- Advanced Options: Recognizing the needs of power users, Snapmaker has also introduced Snapmaker Orca, a slicer that offers even more granular control. Support for direct connection to the entire lineup, including the Snapmaker U1, Artisan, J1/J1s, and Snapmaker 2.0, is also on the horizon.
- Advanced File Formats: While the traditional STL format only contains geometry, the modern 3MF format can store color data, making multi-color models easier to share and print reliably.
Practical Techniques for Better Multi-Color Prints
Design for Color
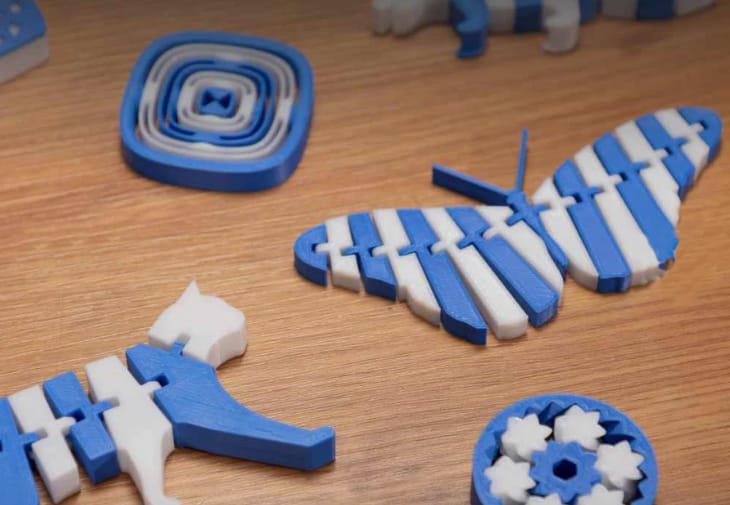
- Sharp Boundaries: Use high-contrast colors for the most defined transitions.
- Natural Seams: Align your color changes with the natural edges or seams of your model to hide transition points.
Reducing Waste & Time
- Purge-to-Infill: Some slicers offer an option to use the purged material for the model's internal infill, cleverly reducing visible waste.
- Strategic Ordering: Plan your color sequence to minimize drastic changes (e.g., from black to white), as these require the most purging.
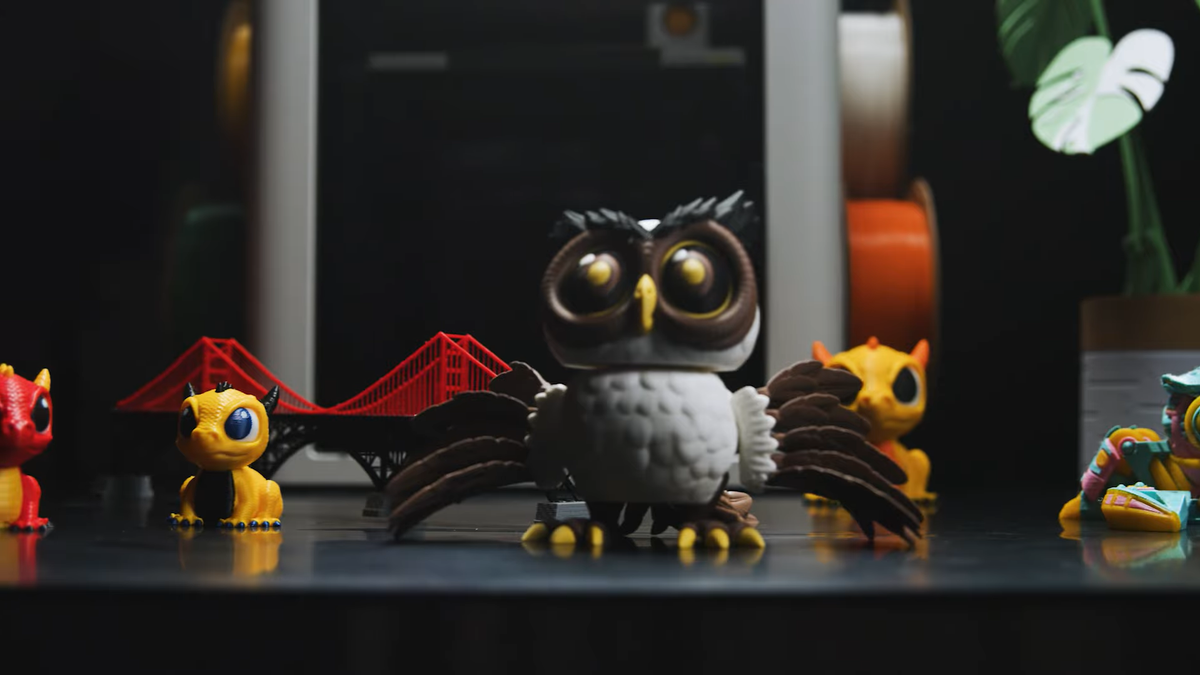
The Future is Colorful and Efficient
Snapmaker U1 Color 3D Printer
The trajectory of 3D printing is clear: toward increasing sophistication and decreasing waste. Tool changer systems like the Snapmaker U1 represent the current pinnacle of this evolution. The future of 3D printing is not just colorful—it's smart, fast, and remarkably efficient.
Frequently Asked Questions on Multiple Color 3D Printing
Q1: Can 3D printers print multiple colors at once? Yes, absolutely. 3D printers can print with multiple colors using several methods. These range from simple manual filament swaps to automated systems like dual extruder (IDEX) printers and advanced tool changers that manage multiple spools of filament automatically.
Q2: How can you 3D print multiple colors without an AMS? Yes, there are several excellent ways to achieve multi-color prints without a single-nozzle AMS (Automatic Material System). While manual filament swaps are the simplest method, more advanced printers offer automated solutions. For two-color prints, Dual Extrusion and IDEX systems use two separate nozzles to eliminate filament switching. For the ultimate in multi-color printing with up to four materials, a Tool Changer system like the one on the Snapmaker U1 offers an alternative. It physically swaps between independent extruders, a process that is faster and creates near-zero filament waste compared to the purging required by single-nozzle systems.
Q3: Is multicolor 3D printing worth it? For many users, it is absolutely worth it. Multi-color printing adds immense value by creating realistic prototypes, functional parts with color-coded information, and visually stunning models. It can also save significant time by eliminating the need for post-processing steps like sanding and painting. While there can be higher initial or material costs, the professional results often justify the investment.
Q4: What is the best 3D printer that can print multiple colors? The "best" printer depends entirely on your needs.

- For versatility, the Snapmaker Artisan with its Dual Extrusion Module is excellent for two-color prints and combining different materials.
- For high-quality two-color prints with special production modes: An IDEX system like the Snapmaker J1s.
- For ultimate automation and material efficiency, the Snapmaker U1 tool changer offers near-zero waste with four independent extruders.
Q5: Can you print multiple things at once on a 3D printer? Yes. This is a special feature of printers with Independent Dual Extruder (IDEX) systems, like the Snapmaker J1s. Using its "Duplication Mode," it can print two identical objects simultaneously, effectively cutting your production time in half.
Q6: How do I stop colors from bleeding or looking muddy in my prints? This usually happens when the old color isn't fully cleared from the nozzle before the new one starts. The key is to ensure you have a large enough prime tower or purge volume set in your slicer, especially when switching from a dark color (like black) to a light one (like white).
Q7: Why are there gaps between the different colored parts of my print? Gaps between colors are almost always a sign that your nozzles aren't perfectly aligned. You need to perform a precise nozzle X/Y offset calibration. This process tells the printer the exact distance between its nozzles, ensuring that one color starts exactly where the other one left off.
Q8: What should I do if one color won't stick to the print bed? This often happens when printing with two different types of materials (e.g., PLA and PETG). Each material has its own ideal bed and nozzle temperature. Check your slicer settings to ensure you have the correct temperatures set for each specific filament to guarantee proper adhesion for both.
Q9: How do you do multi-color prints in Cura or other slicers? The general process is similar across most modern slicers. First, you need a 3D model that has been separated into multiple parts based on color. You then import all these parts into the slicer, assign each part to a specific extruder or color number, and then use the slicer's "merge" function to reassemble them into their final position before printing.