Understanding and Fixing 3D Printer Layer Shift
You walk away from your printer, confident that your print is going well, only to return later and find that sometime during the printing process, the layers have suddenly decided to move horizontally, resulting in a stepped, misaligned mess. This is known as a 3D printer layer shift, and it's a clear sign that something is interrupting the precise movement of your printer's print head or build plate along the X or Y axis.
Unlike first layer problems which occur right at the start, layer shift 3D printing can happen at any height of your print, often ruining hours of work. But don't despair! Like first-layer issues, understanding the core principles behind layer shift 3D printing makes troubleshooting far more effective.
This guide will show you what causes layer shifting in 3D printing and how to get back to flawless prints.
What is Layer Shifting?
In a nutshell, a layer shift occurs when your printer "loses its place" on either the X (left-right) or Y (front-back) axis. Your printer's software tells the motors to move a specific distance for each layer. However, if something prevents that movement from happening accurately, the subsequent layers will be printed in the wrong location relative to the previous ones.
Most desktop 3D printers, including Snapmaker machines, primarily use "open-loop" control. This means they tell the motor to move but don't have a feedback system to confirm it actually reached the intended position. So, if steps are lost, the printer doesn't self-correct, and the error compounds with each subsequent layer. You'll see this as a distinct "step" or offset on the side of your printed object – a clear case of 3D printing layer shifting.
Why Does My 3D Print Keep Shifting Layers?
While the list of potential culprits for a 3D printer layer shift can seem long, most issues trace back to a failure in one of a few core principles essential for precise 3D printing. Understanding these makes troubleshooting far more effective.
Principle 1: Unerring Positional Integrity (The Printer Knowing Its Place)
Successful 3D printing hinges on your printer always knowing precisely where its print head or bed is in X/Y space. Common "open-loop" systems trust that commanded movements are perfectly executed. If the printer loses its true position due to unregistered lost motor steps, its internal map becomes inaccurate, and subsequent layers will be offset, causing a layer shift.
Principle 2: Unimpeded & Accurate Mechanical Actuation (Smooth, Precise Movements)
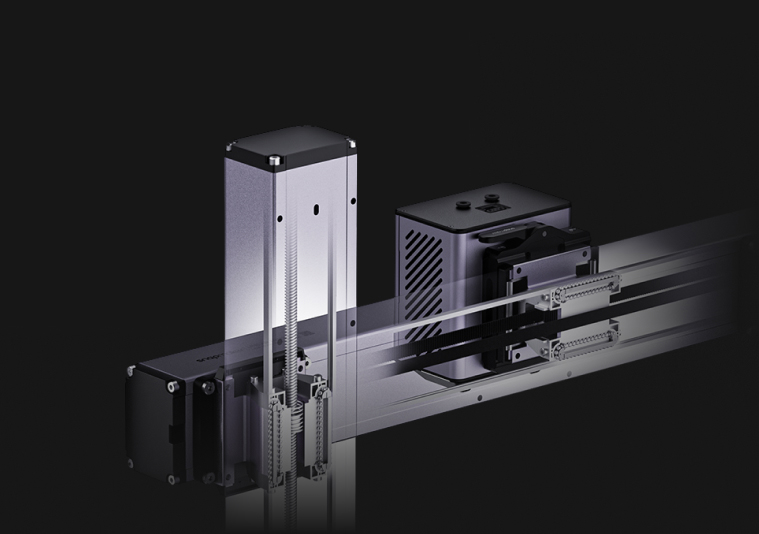
The printer’s electronic commands must translate into exact physical movements by the mechanical system (motors, belts, pulleys, linear modules). If this mechanical action is hindered by binding, slipping, excessive friction, or unwanted play, the commanded movement won't match the actual movement. This discrepancy causes lost steps, leading to the 3D printing layer shifting errors you see. Robust mechanical design, such as the all-metal construction and precise, industrial-grade linear modules utilized by Snapmaker Artisan, aims to uphold this principle by ensuring consistent, low-friction, and play-free movement.
Principle 3: Sufficient & Responsive Power Dynamics (The Right Amount of Muscle)
Stepper motors require adequate, well-controlled electrical power to generate the torque needed to move axes, overcome inertia, and respond to acceleration commands. If motors lack sufficient power for the commanded dynamics, or if power delivery is compromised (e.g., by overheating components), they can be overwhelmed and fail to complete movements accurately, resulting in lost steps and a layer shift.
Principle 4: Collision-Free Pathing & Environment (A Clear Road for the Nozzle)
The print head and nozzle must navigate the build area without physical collisions. If the nozzle forcibly strikes the print (due to warping, blobs, etc.) or any other obstruction, or if external forces interfere, an axis can be physically knocked off its intended path. The printer, typically unaware of such events, will continue from this new, incorrect position, leading to a 3D printer layer shift.
How to Fix a Layer Shift: A Troubleshooting Checklist
So, how do you stop layer shifting and prevent this frustrating 3D printer layer shift? Addressing it requires a systematic check. Start with the most common causes and work your way through, focusing on ensuring each core principle is upheld:
Mechanical Health Check (Addressing Actuation & Integrity - Principle 2)
Check and Tighten Belts: This is often the primary culprit. Belts should be taut – think of a guitar string's low twang – but not so tight they strain motors or bearings. Consult your printer model's guide (e.g., Snapmaker support resources) for proper tensioning.
Inspect and Secure Pulleys: Critically, ensure the small pulleys on the X and Y stepper motors (and any idler pulleys) are firmly attached to their shafts. Make sure the set screws (grub screws) are tight, with at least one ideally seated against the flat part of the motor shaft.
Inspect Linear Modules and Movement Path:
- With motors disabled (usually an option in your printer's menu, or when it's off), manually move the print head and build plate across their full range of motion. Feel for any binding, grinding, or points of unusual resistance.
- Carefully inspect the Snapmaker Linear Modules. Check the steel strips and guides for any foreign objects, dust, or resin residue (especially if you also use laser or CNC functions). Clean them gently with a brush and cloth as recommended.
- Ensure appropriate lubrication on the linear modules.
- Verify that all screws securing the Linear Modules to the printer's frame, as well as screws on the tool head and print platform mounts, are appropriately tightened and haven't vibrated loose.
Check for Snagging Cables: Ensure all cables connected to moving parts have enough slack and are routed to prevent catching on the frame or other components.
Dialing in Dynamics & Power (Ensuring Sufficient Power - Principle 3)
Reduce Print Speed and Acceleration: In your slicer settings (e.g., in Snapmaker Luban or your preferred slicer), try lowering your overall print speed, travel speed, and especially the "Jerk" and "Acceleration" settings for the X and Y axes. Using default, tested profiles for your material in Luban can be a good starting point. Reducing these can prevent motors from being overloaded. Start with a 20-50% reduction as a test if using custom profiles.
Ensure Sufficient Electronics Cooling: Make sure fans cooling your stepper drivers and mainboard are working correctly and aren't blocked by dust or debris. Overheating drivers are a common cause of intermittent layer shift 3D printing issues.
Check Motor Current (VREF) (Advanced): While not a common adjustment for users, if you've meticulously checked everything else and suspect consistently insufficient motor power, you might investigate this. However, this is an advanced procedure. It's generally recommended to consult official support before attempting such electronic adjustments. Incorrect VREF settings can damage components.
Ensuring a Clear Path (Preventing Collisions & Interference - Principle 4)
Enable/Increase Z-Hop (or Z-Lift): This setting in your slicer slightly raises the nozzle when it's traveling between different parts of the print, helping to avoid collisions with the printed object. If you suspect collisions, try increasing the Z-hop height (e.g., 0.5mm to 1mm).
Secure Your Build Surface: Ensure your removable build plate is firmly clipped or magnetically attached to the heated bed carriage so it cannot shift during printing. Check the calibration and flatness of your print platform.
Minimize External Vibrations: Place your printer on a stable, solid surface and avoid bumping the table or the printer itself while it's in operation.
Check Firmware: Ensure your Snapmaker machine is running the latest official firmware. Updates often include improvements to motion control and can resolve bugs that might contribute to printing issues like layer shifting.
A Quick Note: Layer Shifting vs. Layer Separation
While troubleshooting, it's useful to know that 3D printing layer shifting (our focus here, a horizontal misalignment) is different from layer separation (or delamination). Layer separation is when layers don't stick well to each other, causing vertical gaps. That's usually due to temperature, extrusion, or cooling issues – a topic for another day!
Towards Flawless Prints: Conquering Layer Shift
Don't let 3D printer layer shift derail your projects! By systematically checking your printer's mechanics, power delivery, and print path based on the core principles we've discussed, you can effectively pinpoint and resolve what causes layer shifting in 3d printing. Here's to smoother, shift-free printing!